
Why Is My Water Heater Leaking? Read This First
Finding water under the tank is a sinking feeling, and your first instinct is to figure out how bad it is. The good news is that the location of the leak tells you almost everything you need to know. A drip from a fitting up top is a very different problem from water weeping out of the shell near the floor, and knowing which one you have decides if you reach for a wrench or start planning a replacement.
Before you touch anything, understand that a leaking water heater combines three hazards: hot water that scalds, electricity or gas, and standing water. Diagnose from a safe distance first, then act.
Find the Source Before You Do Anything
Water travels. It runs down the side of the tank, pools on the floor, and shows up several feet from where it actually started. Chasing the puddle instead of the source is the most common mistake, so slow down and trace it back up.
Check three zones in order: the connections and valves on top, the body of the tank, and the drain valve at the bottom. A flashlight helps you spot the difference between a genuine trickle and a surface that is simply damp from humidity.
Only once you know the zone can you tell whether this is a tighten-a-fitting afternoon or a call to a plumber.
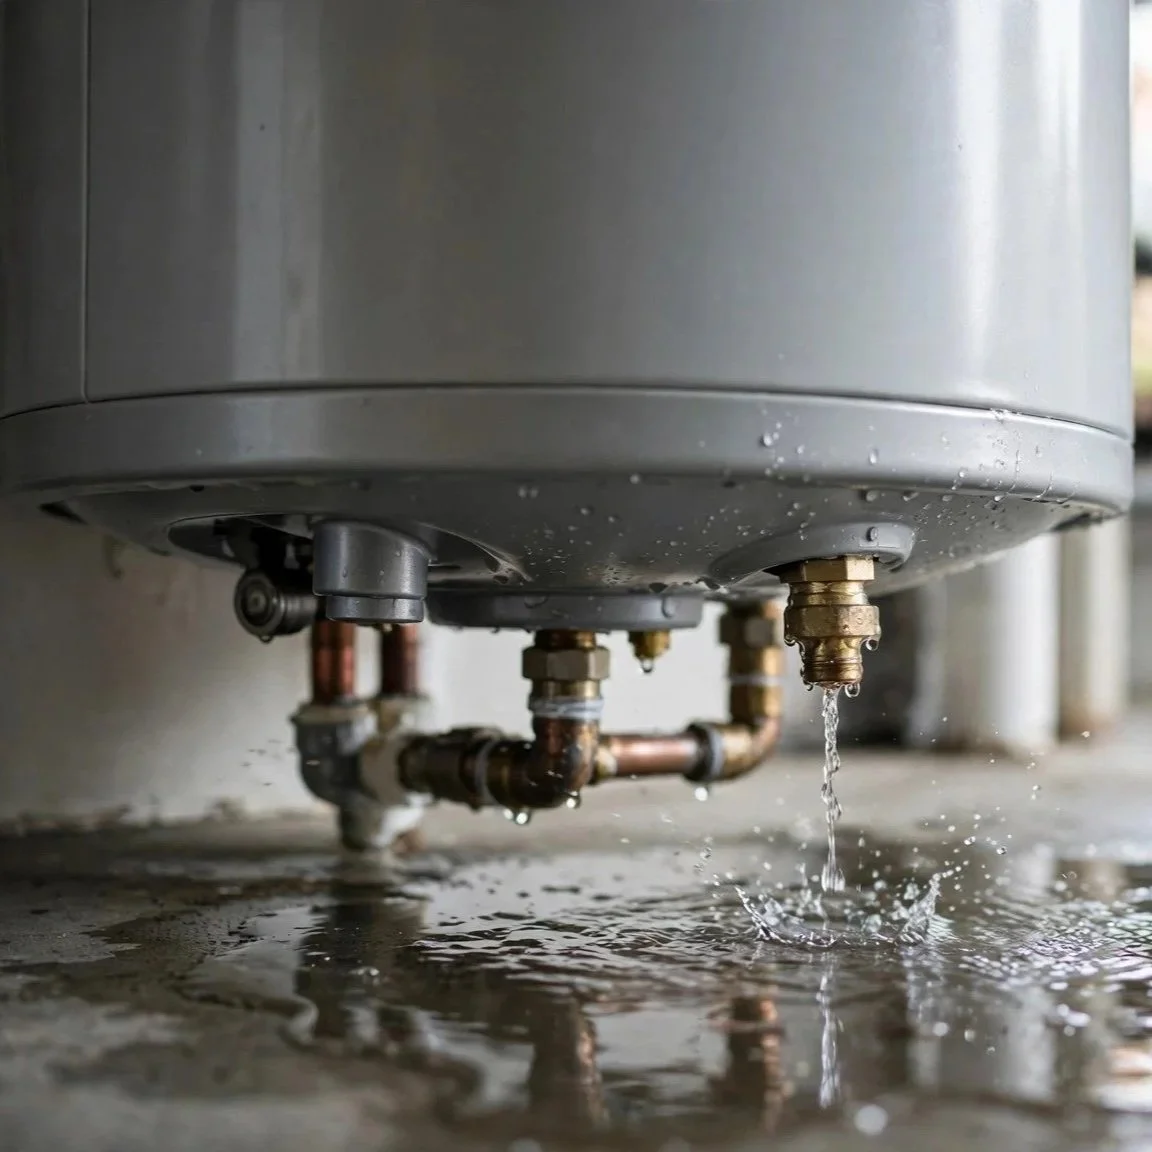
Leaks at the Top Are Usually the Good News
When the water originates near the top of the tank, the odds are in your favor. The parts up there can almost always be tightened, resealed, or swapped without touching the tank itself.
Loose cold and hot water connections: The two pipes entering the top are the most common culprit. Heating and cooling make the metal expand and contract, and over years a threaded fitting or flex connector can loosen enough to weep. A gentle snug with a wrench often stops it. If the connector is a braided flex line, a corroded or split one gets replaced rather than tightened.
The temperature and pressure relief valve or its inlet: This safety valve, usually on the top or upper side, sometimes leaks around its threads where it screws into the tank. Reseating or replacing the valve is a defined repair. What matters is telling the difference between a valve that seeps at its threads and one that is actively discharging out its drain line, which is a separate issue covered below.
Condensation that looks like a leak: Cold incoming water can chill the tank surface below the dew point of the surrounding air, and moisture beads up on the outside. This is sweat, not a leak, and it is worth ruling out before you assume the worst.
Because top-zone problems live in the plumbing above the tank, a plumber can generally repair them and leave you with the same water heater you started the day with.
Condensation or a Real Leak? How to Tell Them Apart
A sweating tank fools plenty of homeowners into replacing a heater that was fine. Condensation is most likely right after a new install, after a large hot water draw refills the tank with a rush of cold water, or in a humid utility space. The droplets sit on the outer shell, spread evenly, and dry up as the water inside warms.
A true leak, by contrast, comes from one identifiable point and keeps coming back to that same spot after you dry it. Run the paper-towel test, then watch the tank through a full heating cycle. If the outside dries out as the water heats and stays dry, you were looking at condensation. If a specific spot re-wets no matter the temperature inside, you have a real leak and need to find its zone.
Leaks at the Bottom Split Two Ways
Water at the base is the diagnosis that makes people nervous, and rightly so, because one of the two causes means the heater is finished. The task is to figure out which.
The drain valve: Near the bottom sits a valve, often plastic, used to empty the tank. It can drip if it was left slightly open, if debris is holding it ajar, or if the valve itself has failed. A drip strictly from the spout of this valve is often repairable by closing it fully or replacing the valve, and the tank lives on.
The tank rusted through: The steel tank carries a glass lining and a sacrificial anode rod that corrodes on purpose to protect the steel. Over years, sediment settles on the bottom and traps heat against the metal, and once the anode is spent, rust eats through from the inside out. When water is weeping from the seam or the body of the shell rather than from a fitting, the tank has failed. There is no patch, weld, or sealant that safely fixes a corroded pressure vessel, which is why this one means replacement.
The tank behaves like a sealed can of soup that has quietly rusted from the inside: the moment it seeps through the wall, no amount of tape on the outside makes it a can again. A shell leak is a full replacement, not a repair.
Why a rusted-through tank cannot be patched: The tank is a sealed vessel that holds pressurized, heated water. External sealants and epoxies cannot bond to a wet, corroded interior surface, and any patch faces the same internal pressure that opened the hole in the first place. A tank that has rusted through will only get worse, and a failing tank can eventually burst. Once the shell is compromised, replacement is the only safe path.
When the T&P Valve Is Discharging
The temperature and pressure relief valve is the single most important safety device on the heater, and water coming out of its discharge tube is a message, not a defect. The valve opens to release water when temperature or pressure climbs too high, protecting the tank from bursting.
If it discharges occasionally in a small amount, it may simply be doing its job during a heating cycle. Repeated or steady discharge usually points to thermal expansion or high water pressure in the home, sometimes tied to a closed system that has no expansion tank, or to a thermostat set too high. These are real issues worth diagnosing, because the pressure they signal is exactly what the valve exists to relieve.
One rule overrides everything: never cap, plug, or block a discharging T&P valve. Sealing it removes the tank's only pressure release and turns a manageable problem into a burst or explosion risk. If your valve is discharging, leave it open, lower the demand on the system if you can, and call a plumber to find the cause.
WARNING: Never cap, plug, or block a discharging T&P valve. Sealing it removes the tank's only pressure release and turns a manageable problem into a burst or explosion risk. If your valve is discharging, leave it open, lower the demand on the system if you can, and call a plumber to find the cause.
Immediate Steps When You Find a Leak
Handle the hazards first, then contain the water. Work in this order.
Shut off the heat source: For an electric heater, switch off its breaker at the panel. For a gas heater, turn the gas control knob to off. Doing this before you go near a leaking unit removes the shock and gas hazards, and it keeps the burner or elements from firing on a tank that may be losing water.
Shut the cold water supply: Find the cold inlet valve on top of the heater and close it to stop more water from feeding the tank. If that valve is stuck or missing, close the home's main shutoff instead.
Drain only if needed: For a bad leak or a tank you already know is being replaced, connect a hose to the drain valve and route it to a floor drain or outside so the tank empties in a controlled way rather than onto your floor. The water can be scalding hot, so give it time to cool or handle it with care.
Contain and stay clear: Use towels, a shop vacuum, or a shallow pan to keep water away from walls and belongings. Keep well clear of standing water near any outlet or the electric heater itself, since water plus electricity is a shock hazard. If the pooling is large or spreading toward electrical, do not wade in.
These steps stabilize almost any leak long enough to get a professional on the way.
When to Call a Plumber
Some leaks are a reasonable homeowner fix, and some are firmly a professional call. Reach for the phone rather than a wrench when any of these are true.
A tank leaking from its shell or seam means replacement, and sizing, connecting, and safely commissioning a new heater is plumber territory. A T&P valve that keeps discharging signals a pressure or temperature problem that needs diagnosis, not a guess. Anything involving a gas heater, from the gas connection to the flue, belongs with a professional because of the combustion and carbon monoxide risks. And any leak large enough to threaten electrical, flooring, or a tank at risk of bursting is an emergency: shut the water and call.
If a simple fitting was loose and snugging it stopped the drip cleanly, you may be done. When the source is the tank, the T&P valve, or gas, bring in help.
Frequently Asked Questions
How long should a water heater last before leaks become likely?
Can I use the anode rod to prevent a tank leak in the first place?
My water heater is leaking but only when the burner or elements run. Why?
Is a little rusty or discolored hot water a sign the tank is about to leak?
Does sediment really cause the bottom of the tank to leak?
What is the difference between a T&P valve leaking at its threads and discharging out its tube?
Trace your leak to its source and get it fixed right the first time — repair or replace, done safely. Much Better Plumbing serves Las Vegas, Summerlin, and Henderson. Call (702) 996-4760.