
Why Does My Faucet Drip? The Worn Part Behind Every Drip
That steady tick of water hitting the sink basin at 2 a.m. is one of the most common calls a plumber gets, and the cause is almost never mysterious. A faucet is built to do one job when the handle is off: press a soft part firmly against a hard part so water can no longer squeeze through. When the drip starts, it means that seal has stopped sealing. The soft part has worn, hardened, torn, or gotten propped open by grit, and water is finding its way past a barrier that used to hold.
Which part failed depends entirely on what kind of faucet you have. Sorting that out first saves a lot of guessing, because the fix for one type does nothing for another.
The Real Reason a Faucet Drips
Every faucet holds back household water pressure with a moving seal. Turn the handle off and a soft component gets pressed hard against a machined surface, closing the only path water has out of the spout. Hold that pressure day and night for years, and the soft side gives out first. Rubber compresses and cracks; plastic and metal wear a groove; and hard water leaves a crust of mineral scale that keeps the two surfaces from meeting cleanly.
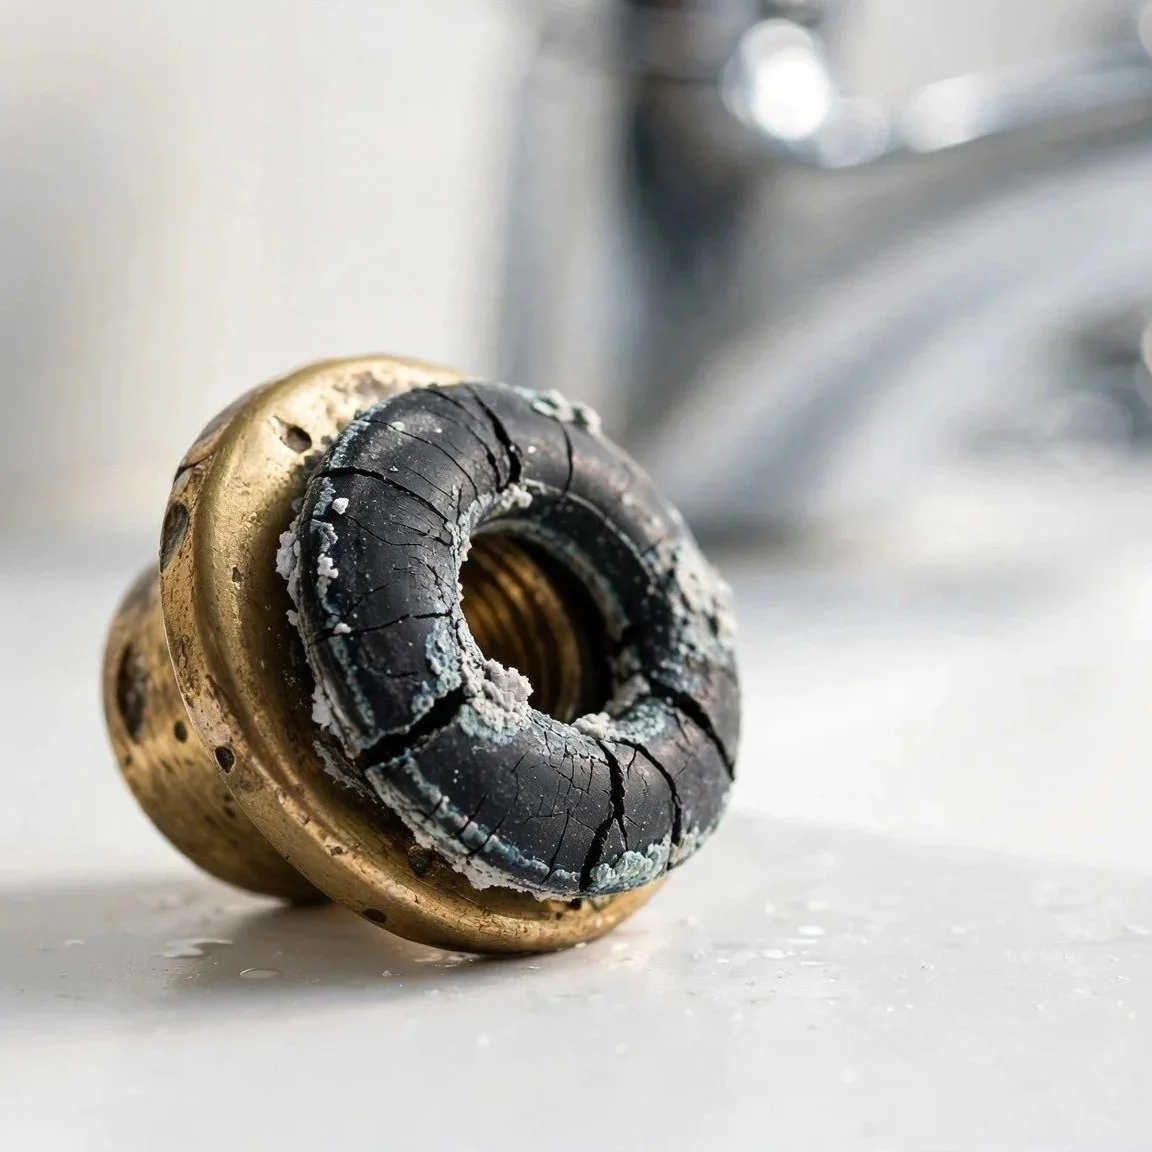
A gasket in a garden hose fitting fails the same way a faucet seal does: the rubber ring flattens and stiffens until it can no longer fill the gap, and a thin stream finds the low spot. Inside a faucet, the gap is microscopic, which is why a worn seal shows up as a slow drip rather than a gush.
Two culprits do most of the damage. The first is simple wear from constant use and pressure. The second is mineral scale. Water carrying dissolved calcium and magnesium leaves gritty deposits on valve seats and moving parts, and even a faint film holds the seal open just enough to let water past. Scale also acts like sandpaper, chewing up soft washers and O-rings faster than clean water would.
Know Your Faucet Type First
There are four faucet designs in most homes, and each one wears out a different part. Figuring out which you have is the single most useful thing to do before touching a wrench.
Compression faucets are the traditional two-handle design, one handle for hot and one for cold, and the handles keep turning and tightening as you shut them off. Inside each handle, a threaded stem drives a rubber washer down onto a valve seat. The washer and the seat are the seal, and they are the parts that wear.
Cartridge faucets come as one-handle or two-handle models. A single cartridge, a cylinder with ports that line up as you move the handle, controls flow and temperature. The whole cartridge is the moving seal, and when it wears, you replace the cartridge as a unit rather than fussing with individual washers.
Ball faucets are the single-handle kitchen style with a rounded cap under the lever. A slotted ball sits over a set of spring-loaded rubber seats. Those seats and springs, plus the ball, are what fail. This design has the most small parts of the four, which is why a ball faucet repair kit comes with several pieces.
Ceramic disc faucets use a single-handle cartridge containing two polished ceramic discs that slide across each other. The discs are extremely durable, so these faucets drip the least, but grit or scale between the discs will still cause a leak, and the disc cartridge is the part you service.
What Actually Wears Out and Why
Once you know the type, the failure points narrow to a short list.
The seal that shuts off flow: In a compression faucet, the rubber washer flattens, and the brass seat below it corrodes or pits, so the two no longer meet cleanly. In cartridge, ball, and disc faucets, the equivalent worn part is the cartridge, the ball with its springs and seats, or the disc unit. Replacing that one component usually stops the drip cold.
O-rings at the base: Not every leak comes from the spout. If water pools around the bottom of the faucet or seeps under the handle when the water runs, the culprit is usually a worn O-ring, a round rubber seal that keeps water inside the faucet body as the spout swivels. O-rings dry out, flatten, and crack with age, and mineral scale speeds that along.
Mineral scale on the seat: Even a healthy washer or cartridge cannot seal against a valve seat crusted with deposits. Scale builds a rough film on the exact surface that needs to be smooth, and it grinds down soft parts as they move. Homes with hard water see this fastest, and it is why cleaning the seat matters as much as swapping the worn piece.
How the Repair Goes
Most faucet repairs follow the same arc regardless of type, and the steps reward patience over force.
Shut off the water first: Close the two supply valves under the sink, the shutoffs for that fixture, and open the faucet to bleed off pressure and confirm the water is off. If the fixture has no working shutoffs, close the main. Skipping this step turns a small repair into a soaked cabinet in seconds.
Take it apart in order: Pry off the decorative handle cap, remove the handle screw, and lift the parts off one at a time. Set them down in the exact order they came off, laid out left to right, so reassembly is just the sequence in reverse. Faucets hide a lot of small washers and retaining clips, and one part installed upside down keeps the drip going.
Replace the worn part: Swap the washer and inspect the seat on a compression faucet, or pull the cartridge, ball kit, or disc unit and drop in the matching replacement. Bring the old part to the store or match it by brand and model, because a cartridge that is close but not exact will leak.
Clean the seat and threads: Wipe scale off the valve seat and the sealing surfaces with white vinegar and a soft cloth or brush before the new part goes in. A clean seat is what lets a fresh washer or cartridge actually seal.
Reassemble gently: Snug the parts back together by hand and finish with a wrench only enough to stop movement. Faucet bodies and handle nuts are often brass or plastic, and overtightening cracks them, which trades a cheap drip for an expensive replacement.
The Water a Drip Really Wastes
A dripping faucet feels trivial because each drop is tiny, but the volume adds up in a way that surprises most people. A faucet dripping about once per second sends roughly five gallons down the drain per day, which works out to more than 2,000 gallons a year from a single fixture. Multiply that by a couple of slow faucets in one house, and the loss is real money and real water. A drip that runs warm wastes energy too, because you paid to heat water that never got used.
That volume is a good argument for fixing a drip promptly rather than living with it. The leak rarely stays the same, either. A washer or cartridge that is starting to fail tends to worsen, and the slow tick becomes a steady trickle as the worn part keeps eroding.
When to Do It Yourself and When to Call a Plumber
A simple washer or cartridge swap on an accessible faucet is a reasonable weekend job with basic tools. Several situations, though, are worth handing to a professional rather than forcing.
Stuck or corroded parts: If a handle, retaining nut, or cartridge will not budge, penetrating oil and steady pressure sometimes free it, but hard yanking snaps stems and cracks bodies. Seized parts are a common reason a simple fix turns into a full faucet replacement.
A cartridge you cannot source: Older or off-brand faucets sometimes use cartridges that are discontinued or hard to identify. A plumber can often match or rebuild what a parts counter cannot.
A damaged valve seat: If the brass seat under a compression washer is pitted or scored, a new washer will drip again within weeks. Reseating or replacing that surface takes a seat wrench or a seat-grinding tool that most homeowners do not own.
A leak inside the wall or cabinet: Water showing up behind the wall, under the cabinet floor, or at the supply connections rather than at the spout points to a supply line or valve body problem, not a worn washer. That belongs to a plumber, and so does any drip that keeps going after you have already replaced the obvious parts, since it signals the diagnosis missed something.
Keeping the Drip From Coming Back
A little maintenance stretches the years between repairs. Turn faucet handles off with a light hand instead of cranking them, since the extra force is what crushes washers and wears seats early. Address hard water where you can, because scale is the quiet accelerator behind most faucet failures; periodically soaking aerators and cleaning sealing surfaces with vinegar keeps deposits from building on the parts that matter. When you do repair a faucet, replace the O-rings and washers as a set rather than the single failed one, so the neighbors that are nearly worn do not fail a month later. And keep the shutoff valves under each sink working by exercising them once in a while, so the next repair starts easily instead of forcing you to close the whole house down.
WARNING: Overflow water that has touched the drain is not clean water, even if it looks clear, so treat it as contaminated. If the water spread far enough to reach an electrical outlet or a plugged-in device, do not step into it to reach the plug. Shut power to that part of the house at the breaker first, then deal with the water.
Prevent the Next One
A toilet that clogged once will clog again if nothing changes.
Flush only what dissolves. Human waste and toilet paper break down in water, and almost nothing else does. Wipes labeled flushable are the single most common culprit behind repeat clogs, along with paper towels, cotton products, and dental floss, none of which come apart the way toilet paper does. A small covered bin next to the toilet ends most of these problems.
Go easy on the paper. If your household favors thick multi-ply paper, a double flush partway through a large amount moves it out before it can bunch up in the trap.
Skip liquid drain cleaners in a toilet entirely. They are formulated for pipes, not for a porcelain bowl full of standing water, and they can sit against the trap without ever reaching the clog, splash back when you plunge, and damage the seals inside the toilet. A plunger or a closet auger is both safer and more effective.
If you have a plunger, keep the flange kind within reach of every toilet. The middle of an overflow is a bad time to discover you own the wrong shape.
An overflowing toilet feels like a disaster, but almost every one comes down to a simple sequence: stop the water at the flapper, float, or valve, figure out whether one fixture or the whole line is involved, then clear it or call it. Handle the first thirty seconds calmly, and the rest is just cleanup.
Frequently Asked Questions
Why does my faucet drip only for a few seconds after I turn it off, then stop?
Can I stop a drip by just tightening the handle harder?
How do I tell whether the drip is from the washer or the O-ring?
Why does my faucet drip only at night or when nobody is running water?
Should I turn off the water heater before fixing a hot-side drip?
Is it worth repairing an old faucet, or is it better to replace it?
Stop the drip before it wastes another gallon — a quick faucet repair keeps your water bill in check and your sink quiet. Much Better Plumbing serves Las Vegas, Summerlin, and Henderson. Call (702) 996-4760.